Electronic Temperature Volume Compensation (ETVC) Installation
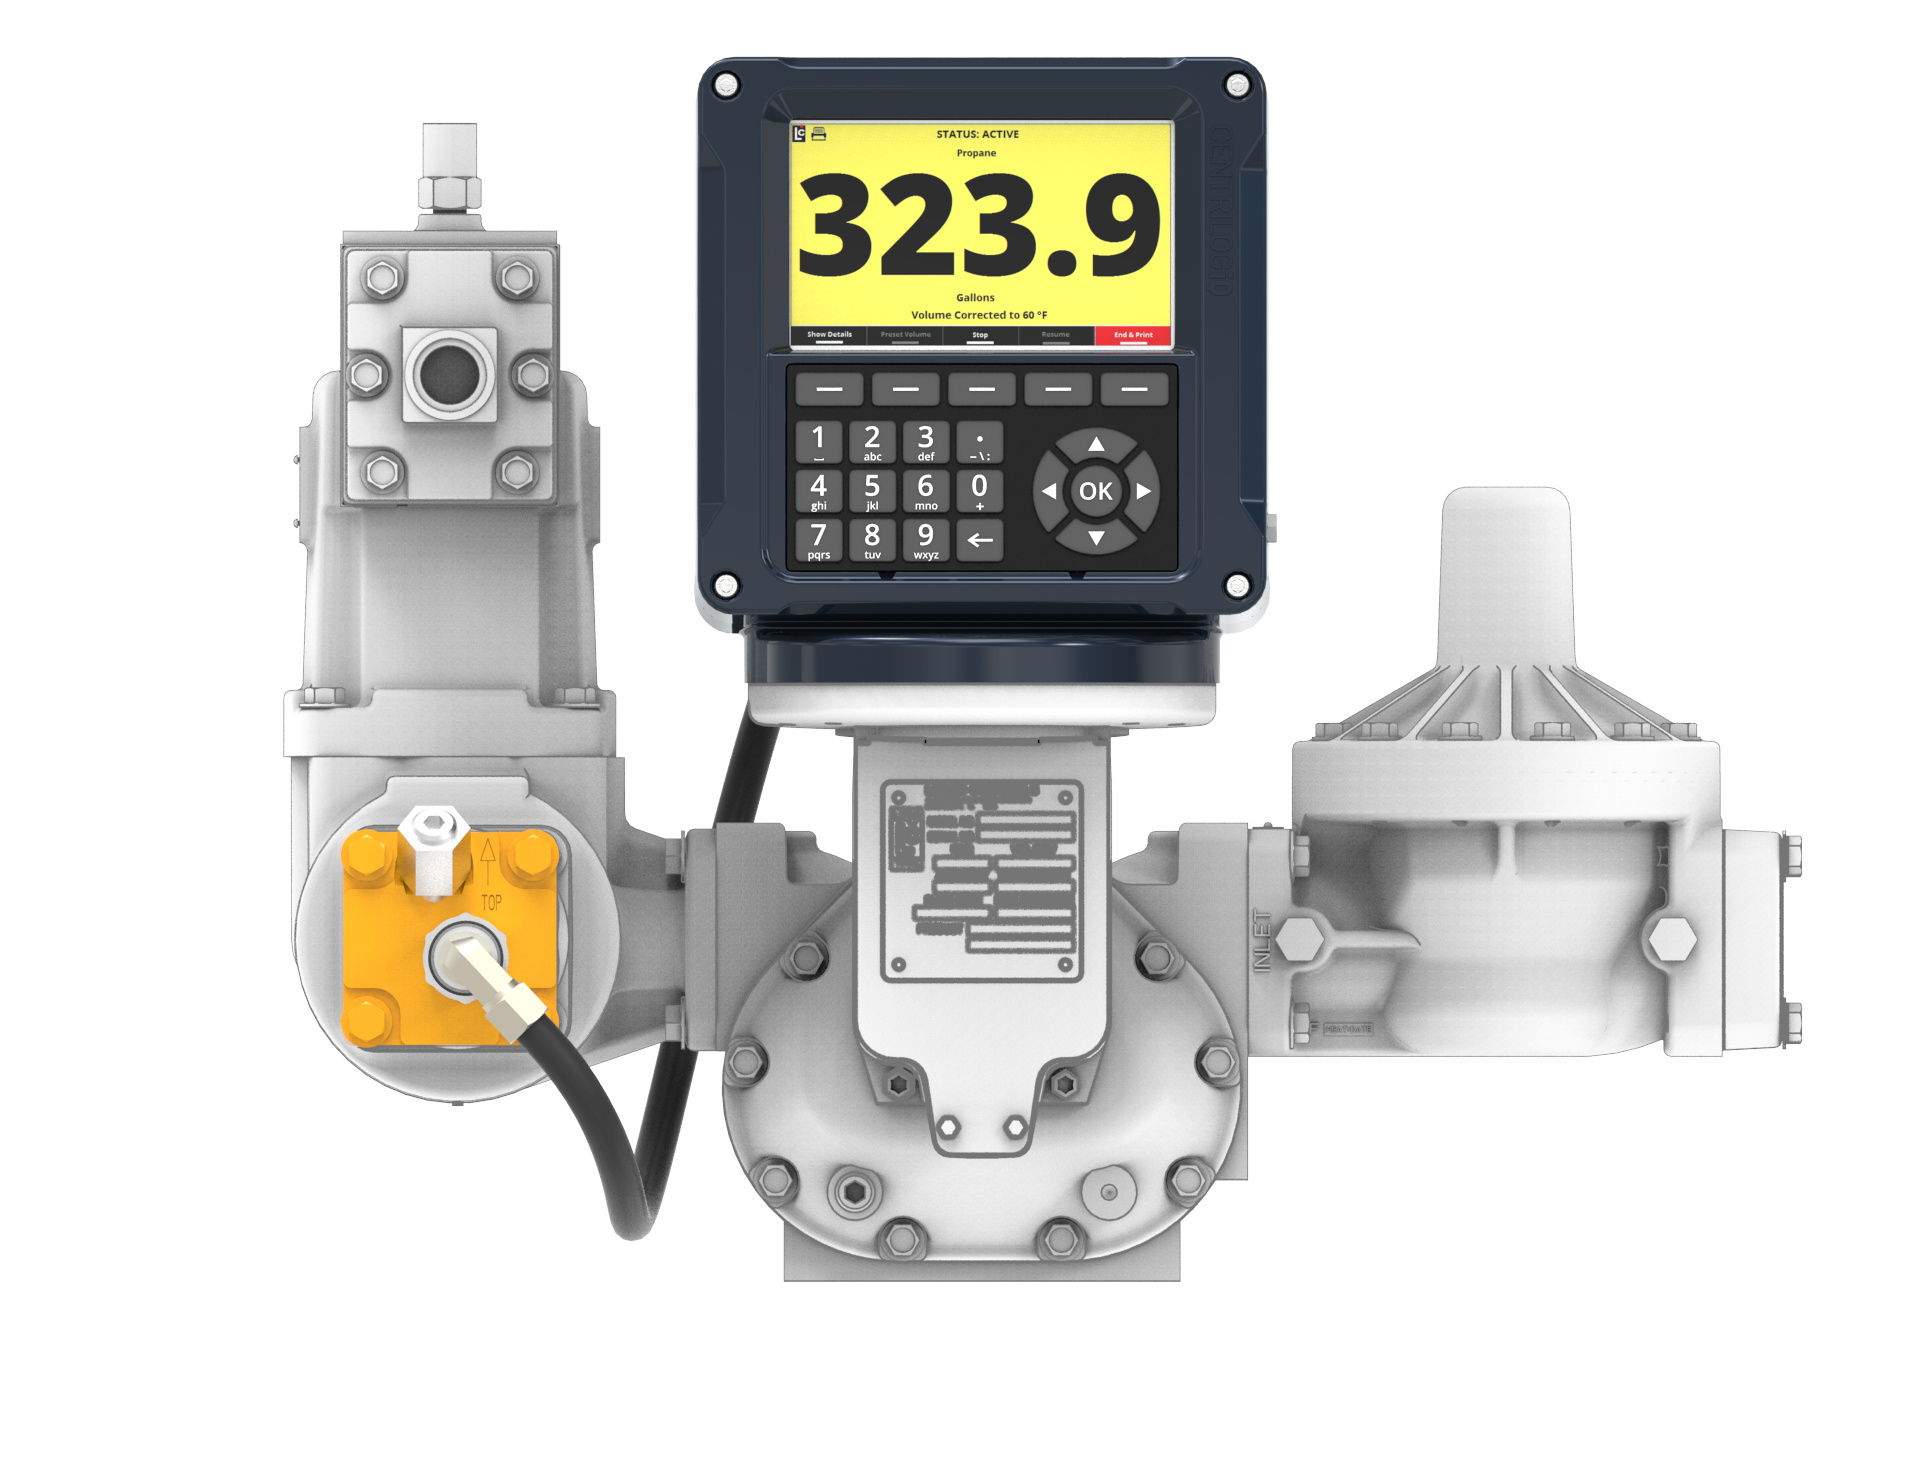
When ordered as part of a meter system with a Register, the ETVC kit is typically bolted onto the strainer and wired to the Register at the factory. ETVC kits can also be ordered and retrofit onto meter systems already in service. Kits are specified according to meter size and application and are all installed in the same manner. For meter systems that do not include an LC supplied Strainer mounting kit, Liquid Controls also offers an ETVC kit for pipe mount.
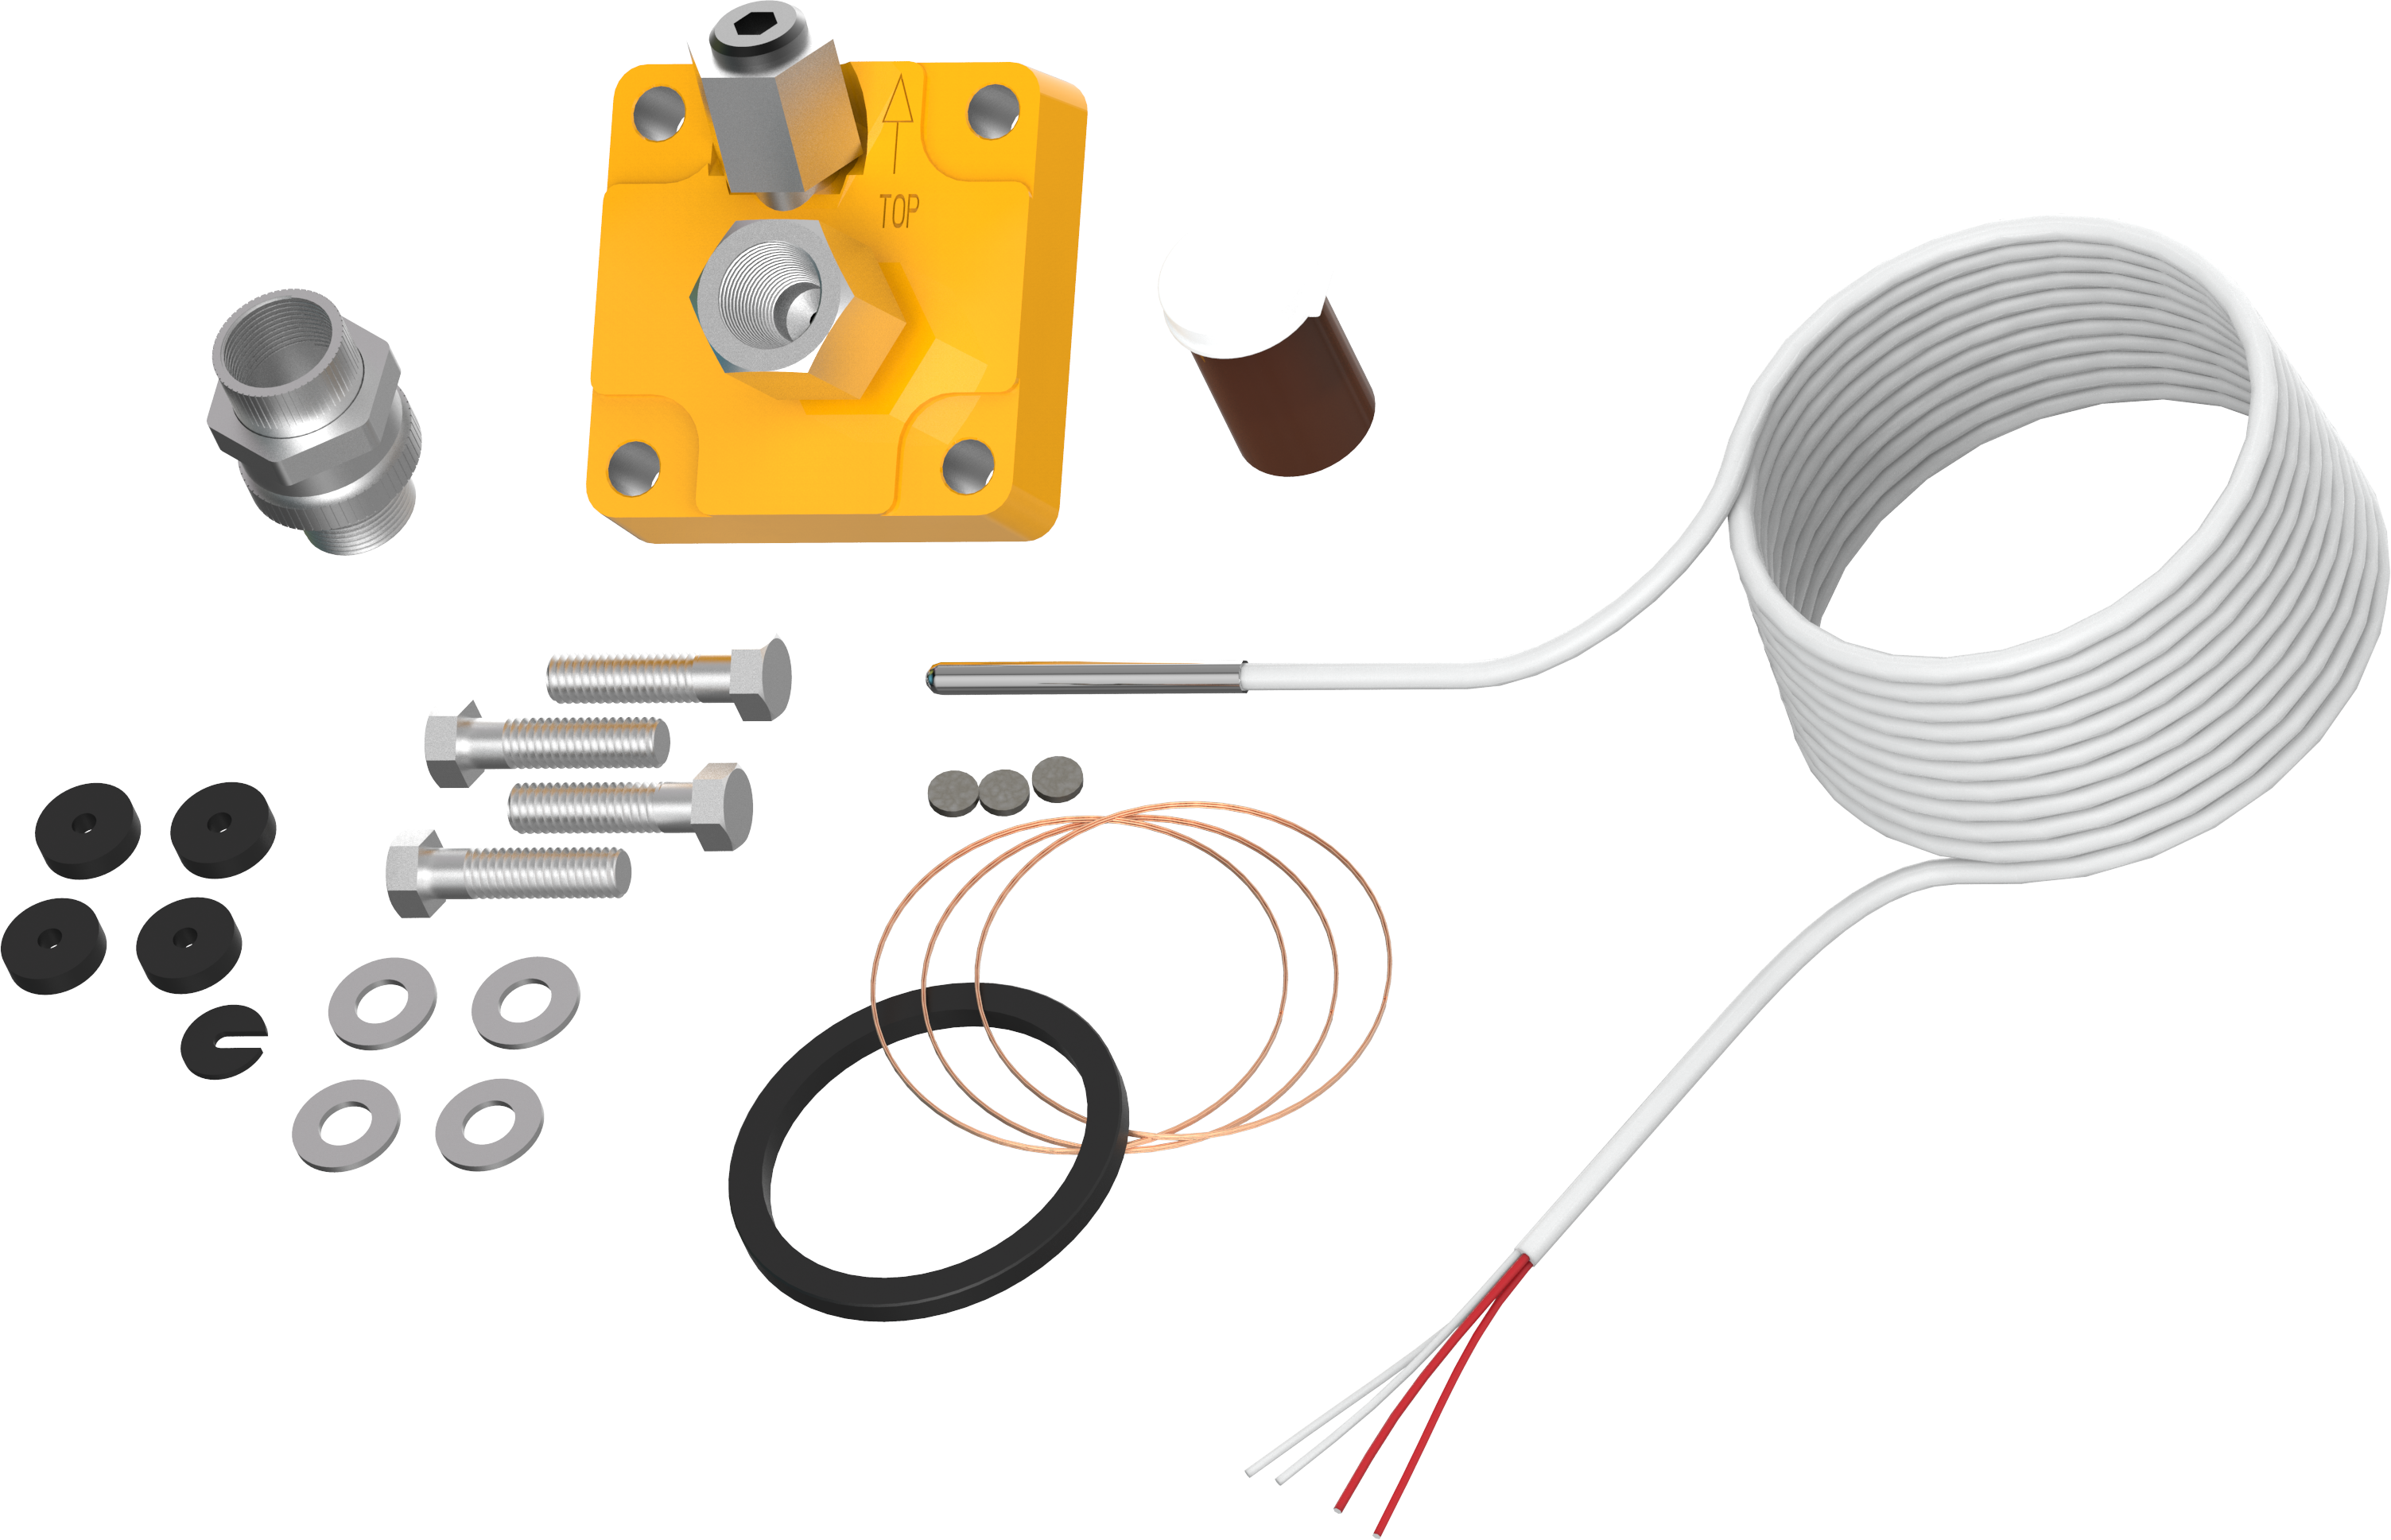
A conduit kit (PN 81024)–with a 30-inch length of weatherproof flexible conduit–is available from Liquid Controls to provide protection for the RTD temperature probe wire between the strainer cover and the Register.
Follow these steps to install the ETVC kit:
1.Depressurize the meter completely. See the Warnings in Mounting Overview.
2.Remove the old strainer cover.
3.Clean the strainer basket and replace it into the housing.
4.Lightly coat the new cover gasket (included with the ETVC kit) with lubricant. DO NOT use the included copper grease.
5.Fit the new cover gasket into the strainer cover groove.
6.Bolt the strainer cover in place. Make sure the weights & measures Thermowell port is at the top of the cover.
7.Assemble the Thermowell kit.
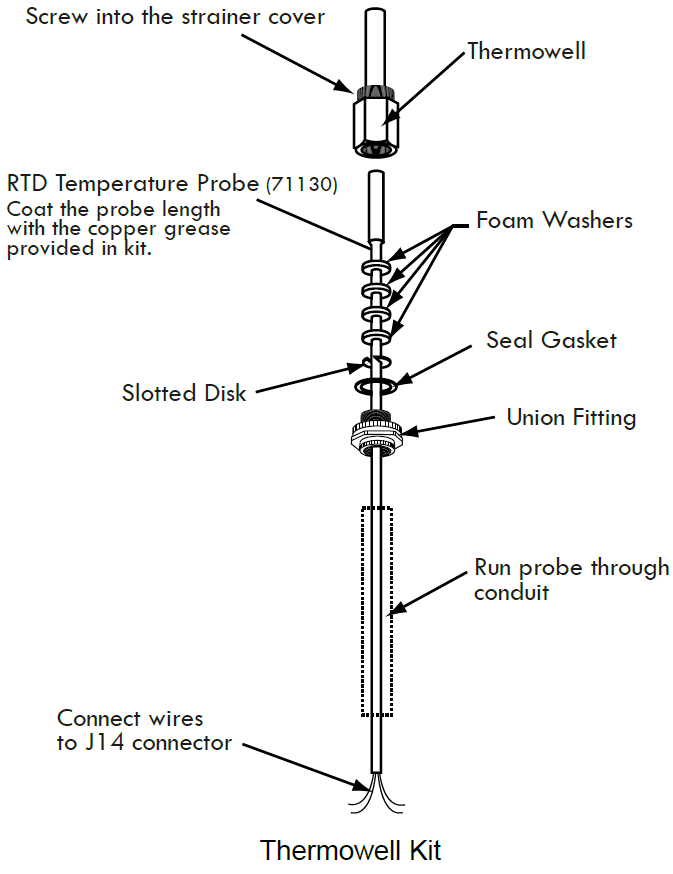
8.Coat the entire probe length with the copper grease provided. Insert and recoat the probe 2 or 3 times to provide a uniform coating inside the Thermowell and to ensure proper heat transfer from the liquid to the probe.
9.Connect the assembled Thermowell to the fitting in the middle of the strainer cover. The angled fitting at the top of the cover is for weights & measures purposes. See Step 6 above.
10.Connect the conduit to a ½" NPT port on the back of the Register using the elbow fittings provided with the conduit kit (PN 81024). Be sure to use thread sealant on NPT threads.
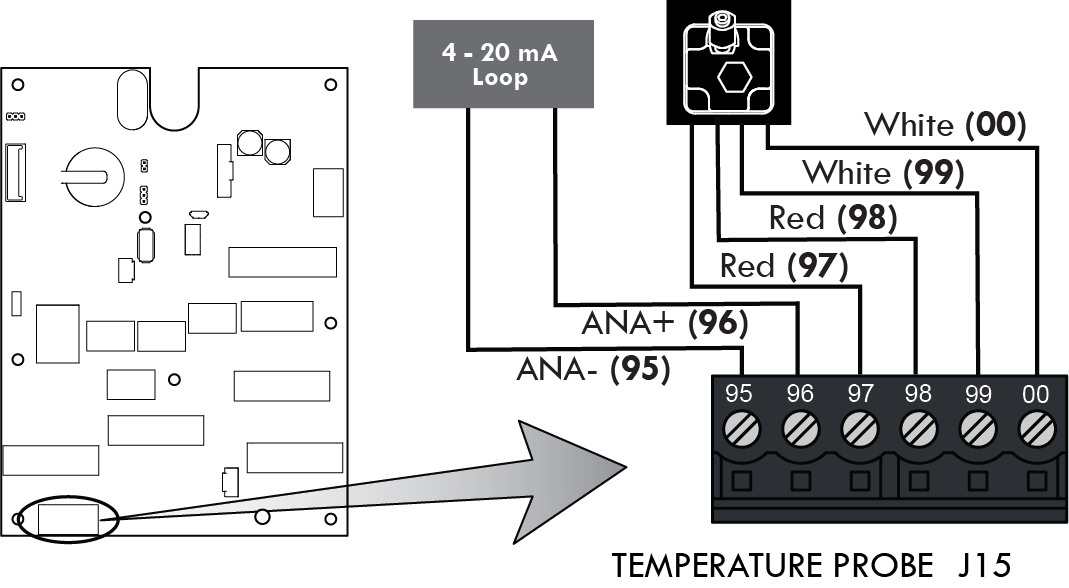
11.Wire the temperature probe to the Register internal board on connector J15. See the circuit board diagrams below.
Disconnect Power |
Disconnect the power before working with the CPU board. |
Diagram for Rev E boards
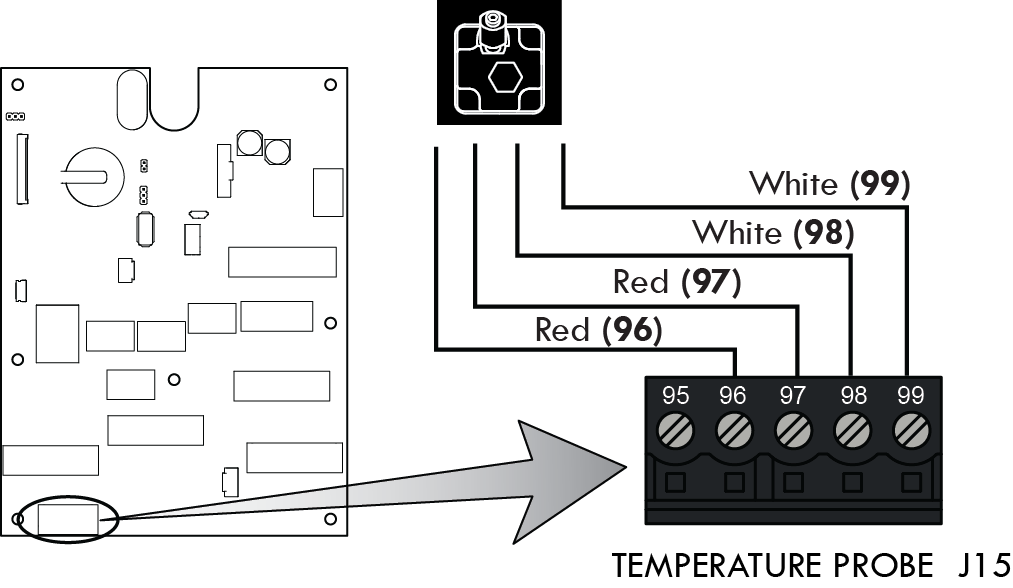 |
Diagram for Rev J or later boards
 |