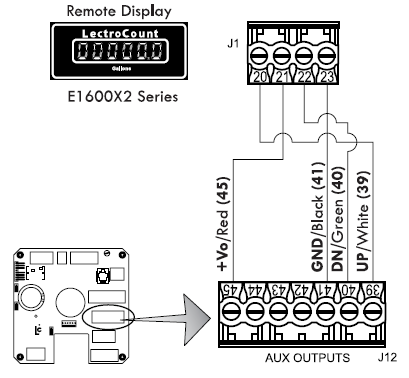
E1600X2 1-inch Large Remote Display
Auxiliary outputs 4 and 5 can also be used for the, now obsolete, E1600X2 1” Large Remote Display.
To wire an E1600X2 1-inch Large Remote Display to the LCR-II:
1.Attach cable glands and/or conduit connectors to the display and the LCR-II port(s).
2.Thread the wires through a piece of weatherproof conduit cut-to-length from the display port to a LCR-II port.
3.Run the weatherproof conduit between the display and the LCR-II housing, pull the wires through the ports, and tighten the connectors.
4.Connect the four display terminals to four terminals on the J18 terminal block of the LCR-II CPU board:
•Remote display terminal 20 to LCR-II terminal 39
•Remote display terminal 21 to LCR-II terminal 45
•Remote display terminal 22 to LCR-II terminal 40
•Remote display terminal 23 to LCR-II terminal 41
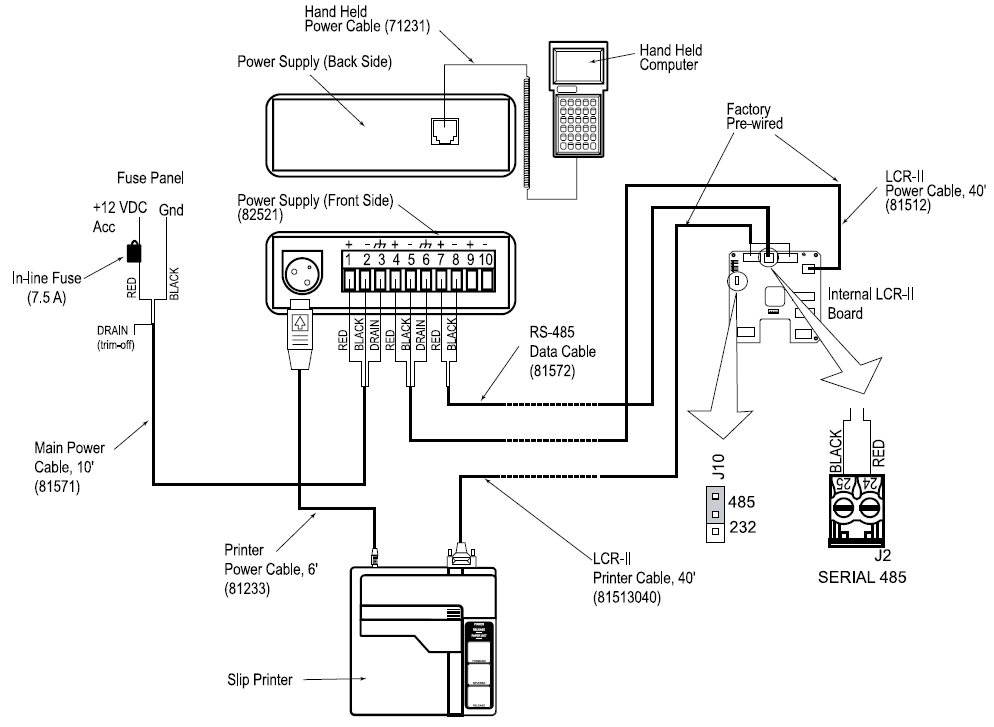
Hand Held Computer
The hand-held computer is connected to the LCR-II through the RS-485 port. For this reason, an extra cable must
be run from the register (J2) to the Power Supply unit installed in the truck cab. For more detailed information on the
setup and operation of the hand held computer, refer to publication number 500096.
To connect the LCR-II to the Hand Held Computer:
1.With the power to the LCR-II OFF, move the J10 jumper to the RS-485 position on the LCR-II board.
2.Connect the two-conductor RS-485 data cable to connector J2 on the LCR-II board. Run the other end of the data cable to the front side of the power supply.
3.Connect the LCR-II power cable to the front side of the power supply in the cab.
4.Run the LCR-II printer cable to the cab and connect directly into the back of the printer.
5.Connect the main power supply cable to the power supply. Connect the other end to the fuse panel on an accessories circuit.
6.Connect the coiled cable provided to the bottom connection of the hand held computer. Connect the other end of the cable to the back side of the power supply.
7.Connect the printer power cable to the back of the printer, and connect the other end of this cable to the front side of the power supply.